Creamy Goat’s Milk Soap
Print
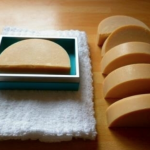
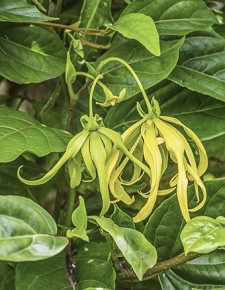
This is a creamy medium to soft homemade milk soap with lots of bubble lather and the beautiful aroma of ylang ylang essential oil. This goat milk soap recipe leaves your skin feeling so soft and smooth, it’s a must make for all soap makers.
Ingredients
Instructions
Gather and measure the natural ingredients from one of our cold process soap recipes. You will need to measure your ingredients carefully, Do Not try to guess or use cup sizes as when you make homemade soap it needs the correct mixture to complete the saponification process. Use either grams or ounces, do not mix the two. I prefer grams as I find it much more accurate, if you need to convert ounces into grams for any reason simply multiply by 28.35.
Prepare a soap mold. If you don’t have a specific soap mold, then any good size container will do. Sturdy plastic containers that still have enough give to ease the soap out make the best containers because you don’t have to line them.
A quick grease round with a little solid oil from the recipe, and they’re good to go. Glass, wood, ceramic or cardboard all lined with freezer/butcher paper will also make suitable molds. Avoid using any metal molds unless you can be sure they are stainless steel.
Bring the milk up to just above room temperature, add the lye to the milk and stir well. Don’t be to alarmed if the lye and milk mix looks a little grainy, continue with your soap making giving it a stir every now and then.
Put on protective eyewear, mask, apron and long rubber gloves. Pour the mineral water into a large glass/sturdy plastic jug or plastic bucket. Slowly, add the lye (caustic soda), using a plastic spatula to stir until dissolved.
The water will start to heat when it reacts with the lye, it will need to cool until it reaches the required temperature (see specific recipe).
In a large stainless steel or enamel pan, gently melt any oils or waxes over a low heat. (this does not include essential or fragrance oils). Use two candy thermometers, place one in the caustic soda mix and one in the oil mix.
When both mixtures reach an equal temperature (see specific recipe) begin to stir the lye into the oil, do this SLOWLY, and remember that you should always add lye to other materials, not the other way around, pouring a liquid into lye crystals can cause it to splash and can burn your skin.
Combine oils lye mixture when both temperatures equally reach between 120°f (49c) 140°f (60c).
Using a stick blender begin carefully stirring your mixture for several minutes, slowly at first without switching the blender on.
Reaching The ‘Trace’ Stage: Then give your mixture a few short 3 second bursts, stirring between each burst until the mixture thickens slightly and looks a little like thick custard.
This is called “trace” and it’s a sign that your soap is turning out well. By dipping your spatula or spoon into the mixture and dribbling a small amount back into the mix. It should leave a light “trace” behind (like a small mound of soap that takes a few seconds to blend back within the mixture.) This is when you know you’ve reached the “trace” stage.
Or by hand which will take a little longer, maybe up to an hour but with consistent slow even stirring with a hand whisk you will eventually reach the trace stage.
And now is usually the time to add any extras like flowers, fragrance, essential oils, colors or textures into your soap recipe. But check the individual recipe to be sure.
Pour your soap into the mold and smooth out using a spatula, place a piece of cardboard over the top of it and wrap an old towel around the whole thing to keep the heat in.
Allow your soap to set for 24 hours in a warm place until the soap has hardened. Don’t be too alarmed if you take a quick peek at your soap and it looks translucent, this is called the gel stage and is perfectly natural.
When the homemade soap has hardened (usually around 24 hrs), remove from the mold and allow it to air for for a few hours. As a general rule it should be about the consistency of hard cheese before you cut it. The soap will still be caustic at this point so I would recommend still handling it with gloves for the first 48 hours.
Cut your homemade soap into blocks, for this you can simply cut by hand for a more rugged look or use your soap cutting box for something a more symmetrical.
Now cover/line a cooling rack, tray or box with a cloth and stand the soap blocks upright without touching each other so the air can circulate. Store them in a dry ventilated place turning them each day in the first week and then every other day thereafter for 4 weeks. This time continues the curing process ensuring that all of the lye has been neutralized and water evaporated. During this time you may find a fine dust on your soap, this is soda ash and can be scraped off before use.
All of the soapmaking recipes on Savvyhomemade allow 5% superfatting. This ensures correct saponification (the reaction that creates soap) making sure there is zero free caustic alkali remaining and a good ph balance is achieved. As long as you have measured your ingredients correctly you have nothing to worry about. To be sure always test soap using a ph strip to make sure it is somewhere between 7-10.
Deprecated: Function the_meta is deprecated since version 6.0.2! Use get_post_meta() instead. in /home/cathys8/public_html/WP/wp-includes/functions.php on line 6031


Reviews
There are no reviews yet.