How to Use?
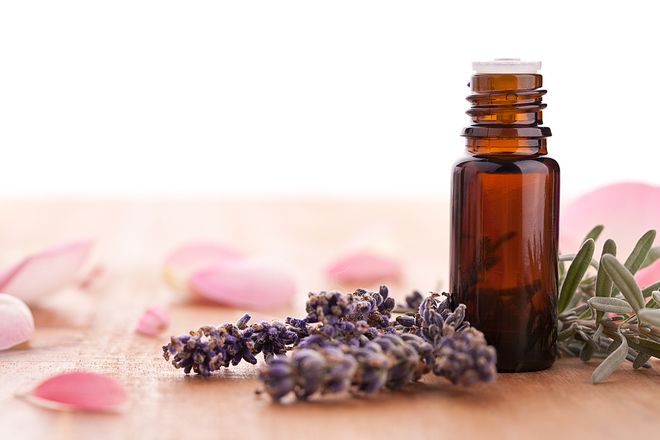
Essential oils are common in many areas as a therapeutic treatment. All practitioners will fall within one or more of these three models – English, French, and German.
- The English model uses a small amount of essential oil added to a large amount of carrier oil for use in massage – for the purpose of relaxation and stress reduction.
- The French model uses the oils undiluted for topical application and prescribe internal use of pure essential oils.
- The German model focuses on the aromatherapy benefits of the oils through inhalation.
While each method is very different, as you can see, there are many ways to use essential oils and derive the benefits from their powerful constituents. Just be sure to exercise caution and do your research.
3 Basic Methods for using Essential Oils
From the 3 models mentioned above, we derive 3 basic ways to use essential oils:
- Inhalation – diffusing or using other methods to inhale the aromas of essential oils provides those oils with direct access to the brain through the limbic system.
- Topical application – massage or direct application techniques are very beneficial for providing direct support to various body systems – the molecular structure of the oils is so small that it can be easily absorbed through the skin.
- Ingestion – oral usage is common in the French model and with many users, but I do caution that you be careful and do your research.
One of the many benefits of the properties of essential oils is that the methods of application are often interchangeable. For example, if you have an upset stomach you might ingest a drop of peppermint oil in a glass of water or just rub the drop on your abdomen (the method I prefer). You derive the exact same benefits.
No matter your method, start slowly
No matter what methods you choose to employ, it’s important to begin the process slowly. My previous post (Essential Oil Safety) shared some basic guidelines for essential oil safety.
How to apply essential oils
Essential oils are easy to apply to the skin. Add a drop or two to your hand and apply directly to the skin. Seems simple, right? Well, there is one important thing to consider.
Essential oils are strong natural substances and very easily absorbed throughout the body. It’s important to remember that they are powerful and treat them accordingly.
Diluting Essential Oils
Essential oils are often applied ‘neat’ (meaning no dilution). But I don’t recommend neat application for everyday use. They are very potent and some of them are even considered “hot”, meaning they will feel very warm, even uncomfortably warm, to the skin. That’s why it’s important to dilute them, especially when you are just learning how to apply essential oils.
Now, there are many oils you could use undiluted but I really don’t recommend it, for a few reasons:
- Essential oils are powerful and should be used with proper care
- Essential oils are easily absorbed through the skin into the body
- More isn’t necessarily better
- Too much oil can cause a detox reaction
- Dilution does not change the efficacy of the oil, it just allows you to use less essential oil per application
- Dilution saves money – those little bottles can get expensive!
- Dilution is very important for babies, small children, and those with sensitive skin
Carrier Oils
Wondering what you’re supposed to use to dilute your essential oils? With a ‘carrier’ oil.
Carrier oils are simply vegetable-based oils that you can use to dilute your essential oils. A few options (look for organic and unrefined, if possible):
- Olive oil
- Coconut oil
- Jojoba oil
- Almond oil
- Grapeseed oil
All you need to do is put a bit of carrier oil in your hand, add a few drops of essential oil and apply directly on the skin. Some oils may stain clothing so wait a few minutes for your skin is dry after the oil application before dressing.
Dilution Ratios
While I think dilution is important, it can be a bit tricky to know how much carrier oil you need. Basically, the smaller the person, the more you should dilute.
- Infants – 1-2 drops essential oil to 1 tablespoon carrier oil
- Children – 1-2 drops essential oil to 1 teaspoon carrier oil
- Sensitive skin – 1-3 drops essential oil to 1 teaspoon carrier oil
- Daily use – 2-3 drops essential oil to 1 teaspoon carrier oil
Applying essential oils
Once you have figured out your dilution ratio, it’s simply a matter of combining the carrier oil and essential oil and applying directly to the area of concern. For new oils, be sure to check for detox reactions and don’t apply more than two oils or blends at a time (in case of reaction).
Use 1-2 drops of oil twice a day on the area. You can increase to 4 times a day, if needed. Once you learn how to apply essential oils you’ll find many ways to use them every day.
Where to apply essential oils
Topical application isn’t that hard to figure out.
Drop, dilute, apply. It’s pretty simple (just remember to dilute your oils). Even better, there are lots of places on your body that you can apply the oils.
- Right at location
- Feet
- Ears – outside or behind (don’t put oils in your ears!)
- Temples
- Abdomen
- Upper back
- Wrists
- Neck
- Nape of neck
Depending on what you are using the oil for, you have a few choices. You can:
- Inhale directly from the bottle (or diffuse) – this is the quickest way to derive benefits from the oils.
- Apply right at the location – if you have a headache, some sort of pain, or other issues, diluting and applying right where it’s needed may be best.
- Apply to the outside of your ears for quick absorption (just remember – don’t put the oils in your ears).
- “Hot” oils for short term use (like Oregano or Thieves) may be applied to the feet (don’t forget to dilute).
- Behind the ears or on the neck or wrists are great places to apply oils for personal diffusing (when you want to benefit from the aroma and the application).
Layering Oils
If you’d like to increase the rate of absorption, layering two oils or an oil and a blend can achieve that goal. It can also be a nice way to create a specific blend for your own needs and increase the potency of the oils.
To layer the oils, apply the first essential oil, rubbing it into your skin, before applying the next oil, along with a carrier oil (a carrier oil is simply a vegetable oil that is used to dilute essential oils so they are safe for everyday use). Dilution is very important so you will need to keep a few carrier oils on hand.
To make the oils even more effective, place a warm compress over the application site. This causes the oils to go deeper into your body.
Always remember to dilute! You can use a carrier oil like almond oil or jojoba oil with a few drops of essential oil.
What to do if an oil causes a skin reaction?
Some essential oils are photosensitive – they shouldn’t be applied to skin that will be in direct sunlight. Doing so could cause a serious reaction.
Occasionally an oil may cause a skin reaction. There are many reasons this can happen and a few things you can do about it.
So what do you do about photosensitive oils or skin reactions?
Essential oils can sometimes cause a skin reaction for a variety of reasons – it could be a “hot” oil that needs heavy dilution, you may have cosmetics or lotions that cause a reaction, you may even experience a slight detoxification.
Overuse of one essential oil (applied topically) can even cause contact sensitization.
If an oil feels hot or causes any discomfort, add more carrier oil to dilute the potency. Don’t try to wash it off with water – that may drive the oils further into your body.
If a body has any detoxification symptoms (rash, nausea, headaches, etc.), dilute the oils that you are using so the body has time to slowly release the toxins. If the reaction is very uncomfortable, stop applying the oils.
If you develop a sensitization to an oil, start varying your usage – many essential oils can often be used for the same issue. So instead of depending on just one oil, use two or three different oils individually, diluting as needed.
Photosensitive Oils
A few essential oils are photosensitive – meaning that they react to sunlight. They should not be applied to skin that will be exposed to direct sunlight.
So if you plan to apply any of these oils, make sure you apply them in locations that won’t be exposed to the sun (or just plan on diffusing them).
Photosensitive oils can cause a rash, discoloration or pigmentation, or even burn the skin so please use caution when applying photosensitive oils.
Photosensitive oils include:
- Angelica
- Bergamot
- Cumin
- Ginger
- Lemon
- Lime
- Limette
- Mandarin
- Orange
- Yuzu
Essential oils have some great everyday uses and once you begin learning how to use them, following these simple guidelines, you’re on your way to creating a healthier home and body.
It’s easy to use essential oils for topical application once you understand how they work, where to apply them, and how to dilute them. But there are many ways to apply them that are very beneficial for your body. Here are 10 ways to apply essential oils:
- Direct application
- Auricular therapy – applying oils to the rim of the ears
- Vita Flex therapy – applying oils to the contact points on the food
- Massage (be sure to dilute oil by 15-30%)
- Foot massage
- Baths (add 3-6 drops of essential oils to epsom salts or bath gel before adding to water)
- Acupuncture
- Acupressure
- Compresses
- Added to lotions, bath gels, or soaps
How to make a compress
A hot compress is an excellent way to intensify the properties of essential oils. The heat from the compress forces the oils deeper into the body.
Apply the oils using the direct application technique. Soak a washcloth in very warm water then wring out. Place on the application area and cover loosely with a dry towel to seal in the heat. Leave the cloth for 10-30 minutes. If you experience any discomfort remove the cloth immediately. Apply a carrier oil to dilute the essential oils.
If you are treating an inflamed or swollen area, you’ll want a cold compress instead of a hot compress. Use either cold water or an ice pack to reduce the swelling or inflammation.
Is there a topical application method that you prefer?
Topical application is an excellent way to enjoy the benefits of your essential oils. Using them in a variety of ways can give you even more confidence in their use. And, through trying these different methods, you’ll discover the ways you are most comfortable using essential oils.
Vita Flex
Vita Flex means “vitality through the reflexes”. In simple terms it is a method of applying oils to specific locations on the feet that allows them to be carried along the neuro-electrical paths in our bodies. Besides diffusing, which is the quickest way for our bodies to absorb the properties of essential oils, the large pores on our feet allow essential oils to travel through our bodies at a very quick rate. While you can simply apply the oils to the specific areas on your feet, using the massage technique described below can be helpful as well.
Rolling & Releasing
Another method used with the Vita Flex technique is the ‘rolling & releasing’ method. When the oil is applied to the feet you use a rolling motion with your fingers along the vita flex area. This is said to be the most effective form of vita flex use. Here’s a quick video tutorial for rolling & releasing.
Vita Flex on the Hands
For those with highly sensitive or pain in their feet, or if you’re just in a hurry, you can apply the oils to specific areas on your hands. There are reflex points that correspond to various organs and body systems on the fingers and palm
Auricular Technique
The Auricular Technique is similar to the Vita Flex method in that specific parts of the body are connected to locations on the rim of the ear. Using essential oils along with acupressure, it’s believed that these neurological points have an effect on various parts of the body
Do you apply essential oils to your feet?
Foot application is an easy way to apply essential oils topically. I usually just rub them on the bottoms of my feet but would like to give the Vita Flex rolling & releasing method a try someday.
